
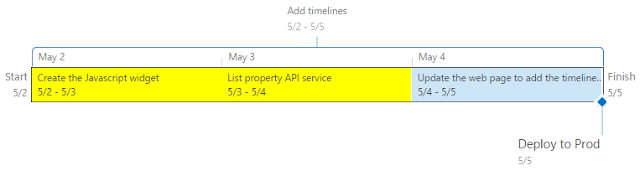
When creating a SharePoint site using the project template a default timeline view is created. A timeline view provides the graph which shows tasks with dependencies on a timeline format. The limitation with this template is that there is only one timeline view created, and we often find the need to create more than one. In this article, we take a look at how we can add additional timeline properties on a project site by using the SharePoint JavaScript Client Object Model (COM).
Timeline
Find the List Folder URL
In order to add a new timeline view, we first need to find out the URL for the list folder properties. This URL is needed to query for the list properties using JavaScript. The URL can be found by visiting Site Content->List Name->List Settings. This link should have this format:
The highlighted text is the information that we need to query the properties.
Script to load the list properties
Now that we have the folder name, we can move on to write the script that can help us query the properties information. We start by creating a JavaScript function which can let us define the request and then make a call to display the properties. The goal here is to become familiar with the SharePoint Client Object Model (COM).
//usage: findProperties('sitename/Lists/Tasks')function findProperties(path) { try { var context = new SP.ClientContext.get_current(); var web = context.get_web(); //build the request for folder and props var url = path; var folder = web.getFolderByServerRelativeUrl(url); context.load(folder); var props = folder.get_properties(); context.load(props); //server call to load the folder and properties context.executeQueryAsync(function () { var fields = props.get_fieldValues(); for(var key in fields){ console.log(fields[key]); } }, onError); } catch (ex) { console.log(ex); }}
The function just makes the call and displays the results on the browser console. This can help us inspect the results and discover what property we need to clone. After looking at the results, we should find a property with the name of “Timeline_Timeline”. This is the property that contains the metadata for the timeline graphs.
Script to clone a timeline view
Now that we know how to query the properties, we can focus on how to clone one. The goal is that we need to create additional timeline properties. This is what allows us to create additional graphs on the project. In order to clone a property, we can leverage our first script to query the properties collection. The change now is that instead of just displaying the properties, we can fetch the property value and create a new one by calling set_item(newPropName, value) on the collection object and update the folder information. This is what adds a new property.
//usage: cloneProperty('Timeline_Timeline', 'Timeline_Timeline2','sitename/Lists/Tasks', function(){},function(){})function cloneProperty(propName, newPropName,path, onOk, onError) { var context = new SP.ClientContext.get_current(); var web = context.get_web(); //build the request for folder and props var url = path; var folder = web.getFolderByServerRelativeUrl(url); context.load(folder); var props = folder.get_properties(); context.load(props); //server call to load the folder and properties context.executeQueryAsync(function () { var fields = props.get_fieldValues(); var value = fields[propName]; if (value) { props.set_item(newPropName, value); folder.update(); //server call to apply update context.executeQueryAsync(function () { var updatedFields = props.get_fieldValues(); onOk(updatedFields); }, onError); } }, onError);}
Simple way to use this script
This script can be loaded from a SharePoint page that includes the SP JavaScript files. The approach to do this is to edit the page and add the script editor web part to the page. This allows us to add embedded script and quickly test our JavaScript changes by reloading the page with the script and calling the functions using the browser console. For example, open the browser console and type:
findProperties(‘'sitename/Lists/Tasks'’)
We could also just add an HTML button and wire the onclick event to call our function.
<input type="button" value="Click to add timeline" onclick=" cloneProperty('Timeline_Timeline', 'Timeline_Timeline2','sitename/Lists/Tasks')"/>
That should add another timeline with the name Timeline_Timeline2
Validate that we have new timelines
After we run the script, we can now edit the default project plan page and edit the timeline webpart properties. On the timeline views, we should see a dropdown with the list of views that are available. Depending on the number of times that you clone a timeline, you should see that many entries.
Keep in mind that the selected view becomes the default timeline. This is important to know because when you add items to the timeline from the task lists, the items are added to the default timeline view.
Enjoy your multi-timeline SharePoint Project site.
 |
| Timeline |
Find the List Folder URL
//usage: findProperties('sitename/Lists/Tasks') function findProperties(path) { try { var context = new SP.ClientContext.get_current(); var web = context.get_web(); //build the request for folder and props var url = path; var folder = web.getFolderByServerRelativeUrl(url); context.load(folder); var props = folder.get_properties(); context.load(props); //server call to load the folder and properties context.executeQueryAsync(function () { var fields = props.get_fieldValues(); for(var key in fields){ console.log(fields[key]); } }, onError); } catch (ex) { console.log(ex); } } |
//usage: cloneProperty('Timeline_Timeline', 'Timeline_Timeline2','sitename/Lists/Tasks', function(){},function(){}) function cloneProperty(propName, newPropName,path, onOk, onError) { var context = new SP.ClientContext.get_current(); var web = context.get_web(); //build the request for folder and props var url = path; var folder = web.getFolderByServerRelativeUrl(url); context.load(folder); var props = folder.get_properties(); context.load(props); //server call to load the folder and properties context.executeQueryAsync(function () { var fields = props.get_fieldValues(); var value = fields[propName]; if (value) { props.set_item(newPropName, value); folder.update(); //server call to apply update context.executeQueryAsync(function () { var updatedFields = props.get_fieldValues(); onOk(updatedFields); }, onError); } }, onError); } |
<input type="button" value="Click to add timeline" onclick=" cloneProperty('Timeline_Timeline', 'Timeline_Timeline2','sitename/Lists/Tasks')"/> |
That should add another timeline with the name Timeline_Timeline2


